Zip Purse
I used this tutorial on http://www.craftandfabriclinks.com to create a little purse so I could have a go at putting in a zip! I've not quite got it right - I'm planning to do it on the machine with the zipper foot, but thought I'd better tack it in place 1st. Somehow although it looks ok from the end, it's a bit wavey then it's closed (3rd pic) so I've obviously got something slightly askew!
This is the 3rd attempt at hand stitching it in - so I'm going to have to take it out and try setting it in again before finishing it off on the machine!
Rose
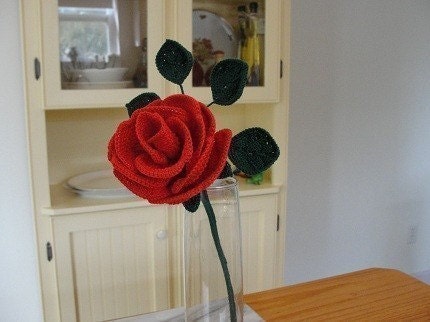
Well I promised my lovely friend Em at Mimi & Tilly (link on the left in our blogroll) that I'd make her a rose. I searched for a nice full blown, blousy one (she loves blousey) and I got a pattern from t'internet.
In theory it should look like this when it's finished...(I am not going to do the leaves, just the flower itself) Pretty and just about the most blousey one I could find!
I've made the 1st petal, which wasn't so hard after I'd had a update to the pattern from Rubiania on Etsy because there was a typo!!! We got it sorted.
However, I didn't realise there was some WIRE involved - well I did, and I bought some florist wire and thought it was going to be for the stem, however I got to the last row of the 1st petal and realised that I have to crochet somehow around the edges of the petals, incorporating the wire, and without a diagram, I've stalled a bit!!!
This is as far as I have got....
I'm sure I'll feel brave at some point! And when I have done one, the rest of the petals will be easy - I've just not quite got there yet. Sorry Em!
Bags
 I've been trying to finish the green one with the square corners off
I've done the flap over the top for fastening it, and I've made a nice stripy lining for it...which looks very pretty but unlike the other bags I've made which were flat, this one is 3D so I *think* that the lining needs to provide a bit more body.
So, what I need to do now, is take the lining apart and re-make it with interfacing in. I don't like that part but it'll have to be done.
I'm thinking a nice gold clasp and maybe a chain handle too.
Do you want to see the *ahem* deliberate mistake in this one....?
I only spotted it when I was doing the photos! Not sure what went on in that row, but clearly i wasn't paying attention! the rest of it is soooooo neat too!
Another bag - this one 'in the round'
So, mostly when I've been making the bags, I've done a front and a back then stitched them together. This time I wanted to do something in the round. That means you start with a flat-ish bottom bit and then spiral around up the sides doing them all in one go.
I have to admit, it's SLOOOOOOOOOOOOOW going - I suppose because there are 2 sides being created at once. But, it seems to be taking ages. I don't think it helps that I've chosen a smaller hook and a denser stitch either. None of this "stitching holes together" stuff. It's taking a while, but I'll get there. Round and Round and Round we go.
I have another BIG project on the go at the moment, but I think I'll put that in a separate post!


Gorgeous things. You are so busy. And I got so excited just now when I saw my name and the beautiful flower you're making for me. I love the first petal! Thank you so much. I have just the vase and place for it. xxx
ReplyDelete