So, as part of our 'get fit in 2011' campaign, we're going to do a little walk to Wakefield - not really but on the treadmill! We're logging our miles on it and then I'm recording the distance on a RunningAhead log for each of us.
So...this is Liza's Walk to Wakey
And, this is Dan's Walk to Wakey
11 Jan 2011
8 Jan 2011
Tutorial - Lined Drawstring "Fat Quarter" Pouch

I've made 3 or 4 of these as quick bags to put some of my recent prezzies in. They're a nice neat way of wrapping the gifts and are super quick and easy to make.
Materials:
1 fat quarter of fabric
2 x 20 inch pieces of cord or ribbon for the drawstring
This is the quick steps version (scroll down for the detailed version with loads of pictures below.
- Take the FQ material and fold it in half, right sides together, along the shorter side. I always iron and pin at this point then you have a lovely flat piece to work with.
- Stitch a 1/4 - 1/2 inch seam down the folded edge.
- Stitch another 1/4 - 1/2 inch seam down the opposite side to the folded edge, making a long tube.
- Slit the folded seam. Press open both seams.
- Stitch across the bottom of the piece, and then the same across the top - leaving a 3 inch gap in the top seam to turn the bag through. Press these seams open.
- Snip a 1 inch square out of each corner - pinch & sew a 1/4-1/2 inch seam across each corner to make the bag have a flat bottom.
- Turn the bag the right way out thru the gap. Use a knitting needle or pen to push out the corners. Press.
- Treating the end with the slit as the "inside" and the other end as the "outside", push the inside of the bag inside the outside.
- You have to jiggle the inner and outer around a bit until the inside is sitting flush with the outside. Once you're happy, press & pin.
- Top stitch about an inch from the top making sure you reinforce just as you go over the side seams on both sides.
- Do the same another 3/4 to an inch below that, to make the channel for the cord - making sure the channel is wide enough for your piece of ribbon or cord. Reinforcing at the seams.
- Using a seam ripper, slit the side seams carefully between the 2 rounds of top stitching, being careful not to go through the top stitching.
- Thread the cord through the channel & tie - one on each side.
- Finish off the gap in the lining - by hand or machine.
- And voila a bag!
Step 1
Take the FQ material and fold it in half, right sides together, along the shorter side. I always iron and pin at this point then you have a lovely flat piece to work with.
It doesn't really matter which way you fold - FQs are all slightly different but usually square-ish - the finished bag will be the size of the FQ folded into quarters minus the seams, so have a go and work out which way you want the finished bag to be. This first fold will determine the width of the finished bag. If you don't have a Fat Quarter, then use a piece of fabric of a similar size - this one was 20.5" x 21.5" - if you don't have that, then you can use 2 pieces the size of a FQ folded in half - say 10" or 11" x 21" or 22". Something like that! If you are using 2 pieces, then pin right sides together.

Step 2
Stitch a 1/4 - 1/2 inch seam down the folded edge.
Seems weird to sew a fold, right? But, I'm lazy and it always seems easier to fold, sew and then split the seam, than to split the material into 2 bits which you then seam together. Of course, if you have a fabric which has an UP and DOWN direction, this is exactly what you *have* to do but lets not consider that for the moment!!!

Step 3
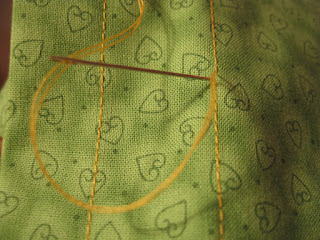
Stitch another 1/4 - 1/2 inch seam down the opposite side to the folded edge, making a long tube.
I just happened to have stitched an 'O' on the front of this bag in the meantime so please don't think there's anything odd about it!!!

Step 4
Slit the folded seam. Press open both seams.
Always press your seams - the bag lies much better when finished if you do this.
 Step 5

Stitch across the bottom of the piece, and then the same across the top - leaving a 3 inch gap to turn the bag through. Press these seams open.
I use a sleeve board to press most of my bag seams - but, like in this case, if you can't fit a sleeve board in through the gap, then just jiggle the fabric round as best you can to get the seams open. Where the seams are stitched at the corners, just do your best - you'll see by the next step, the corners won't matter in a minute, anyway!

Step 6
Snip a 1 inch square out of each corner - pinch & sew a 1/4-1/2 inch seam across each corner to make the bag have a flat bottom.
This is probably the hardest concept and one which I struggled with until I'd made the 1st bag - this is the bit which gives your bag depth, and a flat bottom. There are 2 ways to do it...
- (a) pinch the corners, sew, then cut or
- (b) cut the corners, then pinch and sew
Use a ruler to measure a 1 inch square in each corner of the fabric - then cut out these squares - yes this is supposed to cut across your seams.


Don't worry, you'll be stitching them up again.
Next, pick up one corner by pinching it as you see in the picture and make the the two seams line up. The action is very similar to those Origami fortune tellers you used to make at school...!


You should now get a straight line directly chopping off the corner! You can press and/or pin at this point if you want. I do! Make sure the seams match, and make sure they are pressed outwards and not bunched up. Should look neat and flat like this...

Stitch a 1/4 to 1/2 inch across this diagonal. Repeat for all 4 corners.


Step 7
Turn the bag the right way out thru the gap. Use a knitting needle or pen to push out the corners. Press.
It starts looking like a long, thin, pillowcase with puffy corners at this point.


Step 8
Treating the end with the slit as the "inside" and the other end as the "outside", push the inside of the bag inside the outer piece.
This is the bit where you realise you've made a bag with its own lining, all in one piece!
Step 9
 |
| Grab the top end of the back and shove into the bottom end. Note the slit will end up inside. |
 |
| Nearly in... |
 |
| Inside the bag view |
You have to jiggle the inner and outer around a bit until the inside is sitting flush with the outside. Once you're happy, press & pin.
I usually spend a good few minutes getting the bag to sit right. This is quite important as once you do the next step there's no going back!
Step 10
 |
| First time I've done one with a pic on the front - note to self: next time move the motif a little higher! |
Top stitch about an inch from the top making sure you reinforce just as you go over the side seams on both sides.
By reinforce I mean go back and forward over the seam, this is REALLY important or you might find the bag coming apart at some point.  |
| Reinforced over the seam |
Once you have finished, a fab top tip I learned from FutureGirl's tutorial for creating a lining for a crochet bag which is,
thread both sewing machine threads on a needle and pull to the back through the [fabric]. Tie them to the threads on the back side of the [material]
This makes a really fabulous finish for your top stitching. Do this before moving onto the next step.
 |
| Thread these threads onto a needle and then just stitch through to the inside! |

Step 11
Do the same; another round of top stitching 3/4 to an inch below that, to make the channel for the cord - making sure the channel is wide enough for your piece of ribbon or cord. Reinforcing at the seams.
Don't forget to use FutureGirl's finishing tip as well here!

Using a seam ripper, slit the side seams carefully between the 2 rounds of top stitching, being careful not to go through the top stitching.
These 2 gaps will be where the cord or ribbon goes, and is why you *must* slit the fold in the material described in step 4. If you don't, one of the gaps will not be a gap, but a fold the depth of the seam!!! Not much use for threading your cord into.

Thread the cord through the channel - one on each side.
A safety pin is the key here! The cord needs to be approximately 2 x the width of the bag, plus enough to tie a knot.


Step 14
Finish off the gap in the lining - by hand or machine.
I like to hand stitch the final gap inside the bag - many many blogs suggest you machine close the gap. Up to you! Pinch it shut, pin, and sew by whichever means you like!


Step 15
Voila - a bag.


5 Jan 2011
Fame at last!
The fabulous TabbyCat Fabrics where I buy the majority of my materials have a Customer's Gallery where they publish things made with the fabric bought in the store.
Guess what?
I have THREE entries on their bags page!
Check it out ---> HERE
I am famous!!!
Guess what?
I have THREE entries on their bags page!
Check it out ---> HERE
I am famous!!!
4 Jan 2011
A gift for Jacq
When I finished Auntie Bo's 1st bag way way back in March , I blogged about a website called 'Future Girl's Craft Blog' and her excellent tutorial on "How to create a lining for a crochet bag" - and the complimentary "How to sew in a lining you've made into a crochet bag" from which I have learned a LOT about how to do these things!!
I really liked the way she made quite complicated things seem simple, so when I saw that she'd designed a handbag called the Starling Handbag (with free pattern to download) and then had created some "Crochet-a-long" videos I thought I'd have a go.
It was a bit more complicated than the ones I had made up until that point which had basically consisted of just 2 bits of crochet whip-stitched together at the sides and a handle added on...


Some of the inner lining which inspired the outside...

The other pics of the bag are here on my Picasa web albums
Quite a few people have made the Starling bag and they send pictures to Alice (Futuregirl).
She puts them in a flikr pool called Futuregirl Starling Handbags Pool - Check it out. It's amazing that with 1 pattern, so many different designs can be made..!
I really liked the way she made quite complicated things seem simple, so when I saw that she'd designed a handbag called the Starling Handbag (with free pattern to download) and then had created some "Crochet-a-long" videos I thought I'd have a go.
It was a bit more complicated than the ones I had made up until that point which had basically consisted of just 2 bits of crochet whip-stitched together at the sides and a handle added on...


Even though they're cute...eh?
So anyway, back to the Starling bag - I had a go - I followed the Crochet-A-Long step by step - I struggled and struggled with the Foundation Single Crochet - a useful but b'stard hard divvil of a stitch, and I got there!
I was inspired by some lovely stripy fabric in the Summer of Love fat quarter collection from the fabulous TabbyCat Fabric and so this is what the result looked like...


The other pics of the bag are here on my Picasa web albums
Quite a few people have made the Starling bag and they send pictures to Alice (Futuregirl).
She puts them in a flikr pool called Futuregirl Starling Handbags Pool - Check it out. It's amazing that with 1 pattern, so many different designs can be made..!
3 Jan 2011
Knitting Knightmare!
Well, on New years Day, I sent a few pictures round of my current piece of work - some 'Spingly Spangly Knitting' which will become a shawl for Aunty Bo or Aunty Marg (and another one yet to be started!!!) With Christmas over, I really needed to get a move on as I'm seeing the 2 ladies in question ion the 15th Jan.

I bought the yarn at the Knitting and Stitching Show (see previous blog entry!) from the Fancy Yarn Specialists stall. Very Jazzy it is too - hard to knit with (it's a sort of double stranded yarn with sparkley blocks like the rungs of a ladder joining the 2 strands), and the work grows slowly - I've been at this on and off since October.
Anyway, I decided I *really* needed to get moving and so Saturday I knitted like a mad thing. Finished the 1st ball, joined the second (the instructions are simple - cast on 100 sts - R1. Increase 1 stitch in 1st stitch, knit to the last 2 sts. Knit last 2 sts together. R2. Knit 1st 2 sts together, knit to last stitch, increase 1 stitch in last stitch. Repeat rows 1 and 2 until you finish 2 balls of yarn) and was going great guns.
Yesterday morning (Sunday) I got up and started at it again. The pattern calls you to always increase on one end and decrease on the other, so, as you can see from the picture, you end up with a diamond shaped piece of knitted spingly spangly material - aka a glam shawl. What this means though, is that as time goes on, you get a tail, along the decrease/cast of side, which hangs down, and every so often it wrapped round the needle at the end and needed detangling.
I'd already done it once yesterday morning and was just doing it, very carefully, for the 2nd time, when, disaster struck, the thing which popped off the end of the needle WASN'T the tail which had wrapped around the needle end but the proper stitches which should have been there. Not normally a major disaster (more an inconvenience) but in this case the weight of the fabric pulling down actually caused the stitches to run - like a ladder in a pair of tights.
As I lifted up the end to investigate what was happening, more stitches came of the needle and ran, virtually back to the bottom of the piece of work. Arghhhhhhhhhh!
Every time I touched it, it got worse. Not only that, but the end which the stitches had fallen off was the shaped end - with the casting off - almost impossible to pick up again.
After screaming a bit (well inside my head anyway!) I laid the piece out on the floor and tried to look at what needed to be done. The loose nature of the stitches and the slippyness of the yarn made it nearly impossible. Every stitch investigated - even very very gently - resulted in the 2 either side being dropped. It was getting worse rather than better.
I knew the dropped stitches on the side by the shaped edge were lost, so I decided to grit my teeth and pull back the 10 or so rows which were really destroyed and pick up from there.
As it turned out, this was not such a good idea, just the act of pulling back each stitch had the effect of dropping the 1 or 2 stitches below it. Nightmare.
I kind of knew that I was going to have to ditch the whole thing, and actually coming from that point of view (like Mum's motto for fixing things which is "it's broken anyway, so I can't break it any worse" I thought I'd try and rescue *some* of the stitches, even if I didn't pick them all up perfectly, so long as I have a needle through them, I can then pick them up as I come past on the next row of knitting.
So I started by taking the whole thing off the needles and spreading it out very carefully on the floor...

I then started, with random double pointed needles and crochet hooks and cable needles to just *ssssssslide* the needles through any visible stitch loops - I didn't care whether they were on this row, or the one below or the one below that. The important thing was to stop them running any further down.

I still dropped stitches but I saved quite a few too. I kept thinking "I'll just get 5, or just 10 this time" and kept coming back to it all day. Another 5, another 10.
Soon, nearly all the stitches were at least safe on a needle of some sort...
Then I thought, what I really need is to be able to pick this up - all this was done with it (and me) lying on the floor. Stitch holders were the answer. But, I only had one, and it was about 4 inches long - not really up to the job. I was just about to head off to Hobbycraft to see if they had any, when I happened upon an article which explained how to make them out of coathangers!
I have no pictures of the next bit - but basically I transferred all the stitches on the needles laid on the floor, onto the 2 big DIY stitch markers I made, and the little one I had already. YAY!
I then decided to transfer all the stitches to a needle smaller than the one they'd originally been knitted on - I thought it'd be easier to catch them all - so I went for size 6 needles (the shawl is done on 10s) I also decided to pick them up the WRONG way - ie starting with the end where the thread was - because this would mean that I'd have to pass them from one needle to the other to get them the right way, and this would give me the chance to look at each stitch and work out if it was dropped and then do whatever was needed to fix it.
So by the end of yesterday, I managed to get them all onto a nice size 6, the right way and with 'nearly' all the stitches there... 96 out of my 100.
This morning I started bright and early again - and this time I began knitting again - this time from the 6 onto an 8mm needle - another opportunity to check each stitch - and I found 2 where I'd hastily picked up 2 stitches into one - thereby finding 2 more, by the time I got to the end of the row. I also found a completely new dropped one I'd missed, and realised then that the final missing one must have been the last one cast on at the end of the row which is barely more than a twist in the thread until it's been knitted into a few times.
Yay! 100 stitches. What a relief. I knitted the next row also on an 8mm and so I was ready to go back up to the original 10mm super chunky needles that this all slipped off in the beginning (grrrrrr!)
So, now how to stop it happening again - my 10mm needles now have a "stitch guard" at the end to stop any chance of tangleing or to stop anything dropping off the end...

You may notice the festive theme - circles cut from one of the Christmas cards which are coming down today!

And so, here I am, back to probably somewhere where I was on Saturday, but not quite caught up as the thread which was pulled out from those 10 rows, still hasn't been used up...

As was posted onto my facebook status - I thought knitting was supposed to be a relaxing thing!
Sheeeeeeesh!

I bought the yarn at the Knitting and Stitching Show (see previous blog entry!) from the Fancy Yarn Specialists stall. Very Jazzy it is too - hard to knit with (it's a sort of double stranded yarn with sparkley blocks like the rungs of a ladder joining the 2 strands), and the work grows slowly - I've been at this on and off since October.
Anyway, I decided I *really* needed to get moving and so Saturday I knitted like a mad thing. Finished the 1st ball, joined the second (the instructions are simple - cast on 100 sts - R1. Increase 1 stitch in 1st stitch, knit to the last 2 sts. Knit last 2 sts together. R2. Knit 1st 2 sts together, knit to last stitch, increase 1 stitch in last stitch. Repeat rows 1 and 2 until you finish 2 balls of yarn) and was going great guns.
Yesterday morning (Sunday) I got up and started at it again. The pattern calls you to always increase on one end and decrease on the other, so, as you can see from the picture, you end up with a diamond shaped piece of knitted spingly spangly material - aka a glam shawl. What this means though, is that as time goes on, you get a tail, along the decrease/cast of side, which hangs down, and every so often it wrapped round the needle at the end and needed detangling.
I'd already done it once yesterday morning and was just doing it, very carefully, for the 2nd time, when, disaster struck, the thing which popped off the end of the needle WASN'T the tail which had wrapped around the needle end but the proper stitches which should have been there. Not normally a major disaster (more an inconvenience) but in this case the weight of the fabric pulling down actually caused the stitches to run - like a ladder in a pair of tights.
As I lifted up the end to investigate what was happening, more stitches came of the needle and ran, virtually back to the bottom of the piece of work. Arghhhhhhhhhh!
Every time I touched it, it got worse. Not only that, but the end which the stitches had fallen off was the shaped end - with the casting off - almost impossible to pick up again.
After screaming a bit (well inside my head anyway!) I laid the piece out on the floor and tried to look at what needed to be done. The loose nature of the stitches and the slippyness of the yarn made it nearly impossible. Every stitch investigated - even very very gently - resulted in the 2 either side being dropped. It was getting worse rather than better.
I knew the dropped stitches on the side by the shaped edge were lost, so I decided to grit my teeth and pull back the 10 or so rows which were really destroyed and pick up from there.
As it turned out, this was not such a good idea, just the act of pulling back each stitch had the effect of dropping the 1 or 2 stitches below it. Nightmare.
I kind of knew that I was going to have to ditch the whole thing, and actually coming from that point of view (like Mum's motto for fixing things which is "it's broken anyway, so I can't break it any worse" I thought I'd try and rescue *some* of the stitches, even if I didn't pick them all up perfectly, so long as I have a needle through them, I can then pick them up as I come past on the next row of knitting.
So I started by taking the whole thing off the needles and spreading it out very carefully on the floor...

I then started, with random double pointed needles and crochet hooks and cable needles to just *ssssssslide* the needles through any visible stitch loops - I didn't care whether they were on this row, or the one below or the one below that. The important thing was to stop them running any further down.

I still dropped stitches but I saved quite a few too. I kept thinking "I'll just get 5, or just 10 this time" and kept coming back to it all day. Another 5, another 10.
Soon, nearly all the stitches were at least safe on a needle of some sort...
 |
| It's a bit blurry but you get the picture - 3 different sized needles just holding the stitches! |
Then I thought, what I really need is to be able to pick this up - all this was done with it (and me) lying on the floor. Stitch holders were the answer. But, I only had one, and it was about 4 inches long - not really up to the job. I was just about to head off to Hobbycraft to see if they had any, when I happened upon an article which explained how to make them out of coathangers!
I have no pictures of the next bit - but basically I transferred all the stitches on the needles laid on the floor, onto the 2 big DIY stitch markers I made, and the little one I had already. YAY!
I then decided to transfer all the stitches to a needle smaller than the one they'd originally been knitted on - I thought it'd be easier to catch them all - so I went for size 6 needles (the shawl is done on 10s) I also decided to pick them up the WRONG way - ie starting with the end where the thread was - because this would mean that I'd have to pass them from one needle to the other to get them the right way, and this would give me the chance to look at each stitch and work out if it was dropped and then do whatever was needed to fix it.
So by the end of yesterday, I managed to get them all onto a nice size 6, the right way and with 'nearly' all the stitches there... 96 out of my 100.
This morning I started bright and early again - and this time I began knitting again - this time from the 6 onto an 8mm needle - another opportunity to check each stitch - and I found 2 where I'd hastily picked up 2 stitches into one - thereby finding 2 more, by the time I got to the end of the row. I also found a completely new dropped one I'd missed, and realised then that the final missing one must have been the last one cast on at the end of the row which is barely more than a twist in the thread until it's been knitted into a few times.
Yay! 100 stitches. What a relief. I knitted the next row also on an 8mm and so I was ready to go back up to the original 10mm super chunky needles that this all slipped off in the beginning (grrrrrr!)
So, now how to stop it happening again - my 10mm needles now have a "stitch guard" at the end to stop any chance of tangleing or to stop anything dropping off the end...

You may notice the festive theme - circles cut from one of the Christmas cards which are coming down today!

And so, here I am, back to probably somewhere where I was on Saturday, but not quite caught up as the thread which was pulled out from those 10 rows, still hasn't been used up...

As was posted onto my facebook status - I thought knitting was supposed to be a relaxing thing!
Sheeeeeeesh!
The Knitting and Stitching Show 2010
Way WAAAAAAAAY back at the beginning of my craft odyssey, or April, Jacq sent me a link to this, the "Knitting and Stitching Show" website.
I guess it must have been early days for me because I sort of discounted it as something that only REAL crafters do. However, after a few months of serious craft production, I realised that there was going to be no better place to go - and - it was an excuse to meet up with my mate Jacq for the weekend.
The conversation went a little like this...
Liza: So, are you up for this knitting and stitching show thing then?
Jacq: Oh yes, definitely.
Liza: I've been looking at the website, looks like there's the one in London, which would be nice, but there's also one in Harrogate - you could stay with me and also visit your Nans at the same time????
Jacq: Good idea.....but....have you seen where the other one is.....?
Liza: Dublin?
Jacq: Dublin!
Liza: Ohhhh, are you thinking what I'm thinking?
Jacq: Girls' weekend in Dublin?
Liza: It's a deal!!!!
Jacq: See you there!!!
Isn't it lovely when you have friends who think along the same lines as you?
So, with no further ado, we booked into the Gresham on O'Connell Street, and booked flights (from Leeds and Southampton) which landed within an hour of each other.
Friday morning dawned (we were up already - it was an early start!!) and by 9:30am we were checked into the hotel, and off in search of breakfast - most important meal of the day - especially when you got up at 4:30am!
We found it in the pub about 5 doors down from the Gresham - Murrays Grill and Bar - who, for about one third of the price of the breakfast in the Gresham, provided, Tea/Coffee OJ and the most brilliant breakfast baps (egg, bacon and sausage!) ever tasted!!!

We confess to having one of these brekkies every day!
So then, thanks to Jacq's brilliant organisational skills, we had bought super all-city bus tickets for the 3 days, and jumped on the bus to the K&SS venue - this was a 15 minute bus ride out to the RDS in Ballsbridge (no sniggering)
By 10:30 we were getting off the bus (it has to be said - with many many other ladies of a certain age - maybe WE are now ladies of a certain age?) and crossed the road to the exhibition centre.
With our pre-paid tickets, we didn't have to queue, and after a "double Yorkshire moment" with neither of us wanting to pay to put our coats/bags in the cloakroom ("I'm not paying €2 to hang my coat up") we entered the main event hall.
WOW!
It was a bit mind boggling. A bit like a market with loads of tightly packed stalls...we were faced with wool, ribbons, buttons, lace, sewing machines - you name it - it was there!
So, we decided to proceed in the most logical fashion which was up the 1st row and down the next!!! Each stall was numbered and therefore we kept a note of the ones we liked, so that we could come back to buy things on another day. We could do this because when we pre-ordered the tickets, we spotted quite a good deal on a 'group ticket' which allowed us to buy 4 tickets at a reduced price, but the 4 tickets didn't have to be all used at the same time - so basically we decided to use 2 to visit the show on the Friday, and 2 for the Sunday, and then we'd have Saturday to explore Dublin itself!
So we trolled up and down, chatting to the stallholders - all of whom were crafters themselves and all of whom were available for a chat! It was really really nice.
After a couple of hours, we were only about half way round and so stopped for a bite to eat - I think it involved chocolate muffins (although there was a full on canteen where what looked to be very nice food was being served) we stuck to the coffee and buns!!!
From the upper balcony of the exhibition centre, we were able to see all the stalls laid out below...

You can just about see the upper balcony with further stalls and exhibition stands - and people demoing their crafts - spinning, felting, embroidery. Fabulous!!!
We managed to keep going 'till about 3pm (not bad given the early start) with, I think, only one other stop for coffee and cake...

And then it was back on the bus to the city centre.
As I recall, there was then, a torrential deluge - during which I realised my mac wasn't waterproof...because by the time we arrived in the pub in Temple Bar, I was actually soaked through to the skin!!!!
Fortunately, a pint of Guinness and a Hot Port soon warmed me up again and we were able to continue on for dinner.
Subscribe to:
Posts (Atom)